Have you ever felt your Link Camera WiFi connection failing? Then it can be frustrating for you especially when you rely on them to monitor your home or office.
But you don’t worry about this problem. In this article, we discuss the reasons why your blink camera might be struggling with connecting to WiFi and share some simple solutions to help you get it working again.
With some of these helpful troubleshooting tips, your blink camera will be connected to WiFi in no time.
How Do You Fix Blink Camera Not Connecting to WiFi?
Several factors can impact the connection process when setting up Blink cameras. Any of these factors might be causing your connection issues.
Here are a few typical reasons why connections may fail:
- Weak internet connection
- Using a 5 GHz Wi-Fi band instead of the required 2.4 GHz band
- Wi-Fi SSID or password containing special characters
- VPN or ad blocker running on your mobile device
- The camera is positioned too far from the router
- Camera not being in pairing mode
- Router firewall or settings preventing new devices from connecting
- Incorrect Wi-Fi password entered during setup
- Connecting the camera to an improperly set-up sync module
For most Blink camera models, except the Blink Mini, you need an active sync module for setup and control through the Blink app.
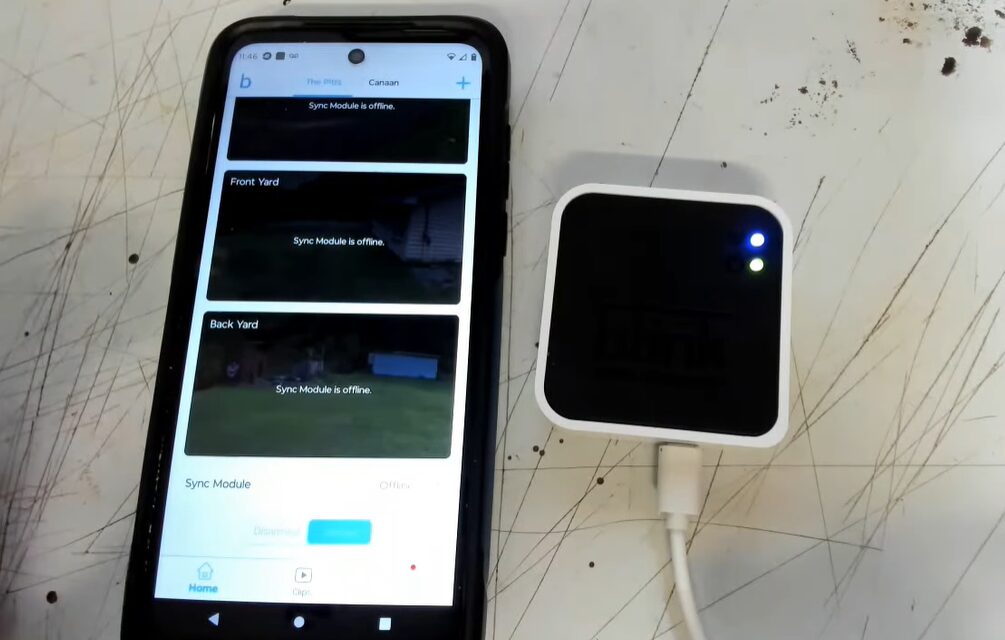
Make sure your sync module is properly installed and running on the app. When it’s successfully connected, the sync module’s LED lights will show a solid blue and green. After that, you can add your cameras to the Blink system.
The Blink Mini camera is different—it can connect directly to the app without needing a sync module. If you’re using a Blink Mini, you can skip the sync module setup and proceed with connecting it straight to the app.
Fixing Blink Camera Connection Issues
Blink cameras don’t connect to 5 GHz Wi-Fi networks. To set up your camera, make sure your phone is linked to a 2.4 GHz network, and remember to turn off any VPNs you have running.
Also, check that you’re using the latest version of the Blink app. Keeping the app updated ensures you have the best features and fixes.
If you’re still having trouble, try power cycling your router and Blink devices. To do this, disconnect them from the power source. Wait for about a minute, then plug them back in. This simple step can refresh the connection and clear up temporary issues.
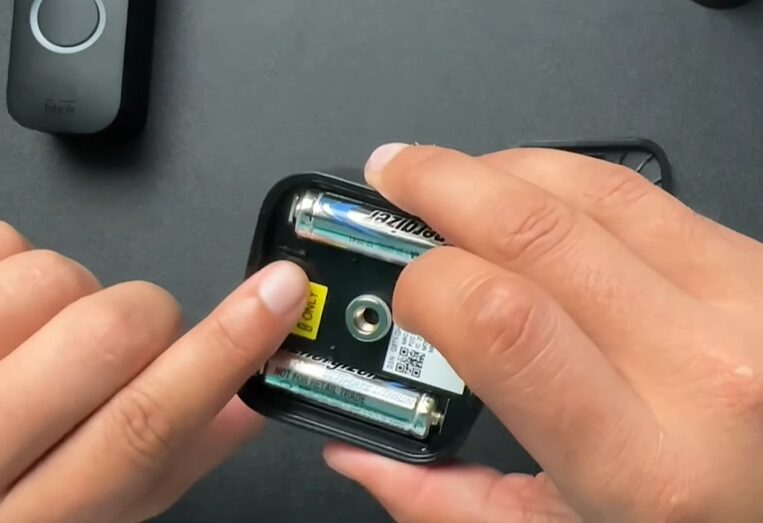
For battery-powered cameras, double-check that the batteries are inserted correctly and that they fit snugly in their slots.
Use 2.4 GHz for Best Performance
Most modern routers now support two frequency bands: 2.4 GHz and 5 GHz. The 5 GHz band provides faster speeds and greater bandwidth but has a shorter range. In contrast, the 2.4 GHz band offers less speed and bandwidth, but it covers a larger area.
Since Blink devices only work with the 2.4 GHz band, it’s important to adjust your router settings during setup. If your router broadcasts both bands, disable the 5 GHz option.
Another option is to create separate network names, known as SSIDs, for the 2.4 GHz and 5 GHz bands. This means you will have two different networks, each with its name and password. You should connect your smart devices to the 2.4 GHz network.
I suggest this strategy since it can assist with staying away from issues down the line. If your devices accidentally try to connect to the 5 GHz network, it can lead to connectivity issues and offline errors.
Restart Your Blink Camera
If your Blink Camera isn’t connecting, sometimes the easiest fix is to restart it. This simple step can often resolve issues and get your camera back online. Here’s how to do it:
- Look for the power cable attached to your Blink Camera.
- Carefully disconnect the power cable from the camera.
- Take about 10 seconds to ensure the camera is fully powered off.
- Reconnect the power cable to the camera.
- Give your camera a moment to turn back on and reconnect to the Blink sync module or your Wi-Fi network.
Restarting your camera can fix many connectivity problems and restore its functionality. If you still can’t connect after restarting, consider troubleshooting further or reaching out to Blink customer support for help.
Check the WIFI Signal Strength
To set up your Blink cameras and keep them running smoothly, you need a strong internet connection. Some router and Wi-Fi settings may prevent your cameras from connecting properly.
First, ensure your Wi-Fi network is functioning admirably. Test your connection by stacking various sites. Your internet speed should be at least 2 Mbps for both upload and download. This ensures the camera can sync with the cloud servers and connect to your network without issues.
Then, check your router’s MAC address filtering settings. If it’s turned on, it may block devices it doesn’t recognize, including your Blink cameras. Disable this option to allow new devices to connect easily.
Many routers come with a firewall set to “max” protection by default. This can prevent new devices from joining the network. Change this setting to “low” to make it easier for your Blink cameras to connect.
Make sure your router is not blocking your Blink camera or sync module. Routers sometimes identify Blink devices by their radio chips rather than their names. You might see labels like “generic security camera” or “my simple link.” If your router alerts you about an unfamiliar device trying to connect, it could be your camera. Make sure to allow it access.
Finally, when entering your network credentials in the Blink app, ensure you use the correct password. A simple mistake can prevent your camera from connecting.
Move The Router Closer to Your Camera
As you move away from your Wi-Fi router, the 2.4 GHz signal becomes weaker. Additionally, more obstacles like walls and furniture can interfere with the signal strength.
To ensure a better connection, I suggest placing the camera closer to the Wi-Fi router during the initial setup. Once you’ve confirmed a solid connection, you can then relocate it to its final spot.
Make sure you’re within the range of your network and that the installation area gets a strong signal. You can easily check the strength of your connection by looking at the Wi-Fi bars in the app.
If you find that the signal is still weak, consider using a network extender or upgrading to a mesh Wi-Fi system. These solutions can help distribute your network signal evenly throughout your space.
In the end, make sure the installation point has a strong signal to prevent your camera from going offline.
Blink Sync Module for Camera Setup
To set up your Blink outdoor and indoor cameras, you’ll need a sync module. This module acts as the communication hub between your cameras and your Wi-Fi network. Your cameras connect to both the sync module and the Wi-Fi.
Before adding your cameras, check that the sync module is connected and running in the app. You’ll know it’s working properly if the LED indicators are solid blue and green.
If you see any other color combinations, it means there’s an error that needs fixing. Make sure to resolve this issue before you proceed with adding your cameras: Sync Module Not Working.
Reset Your Blink Camera and Reconnect
Resetting your camera can help solve connection issues by putting it into pairing mode. This process also clears out any corrupted settings that might interfere with the camera’s ability to connect.
To reset your Blink Mini camera, find the reset button. Use a thin pin to press it for about 10 to 15 seconds. This action will put the camera into setup mode.
Next, you can reconnect the camera using the Blink app. Here’s how to do it:
- Open the Blink app.
- Tap the “+” icon.
- Select your camera type.
- Scan the QR code.
- Discover devices.
- Connect to your Wi-Fi network.
- Customize your camera settings as needed.
Following these steps should resolve the camera connection problem. If you still face issues, don’t hesitate to reach out to Blink support for further assistance.
Disable VPN and Ad Blockers for Smart Device Setup
Using a VPN or AdGuard on your mobile device hides your IP address. This means your device can’t connect with others on your network. When you have a VPN or ad blocker active, your device operates on a different network than your router’s local network.
To set up smart devices on your network, make sure to turn off your VPN and AdGuard first.
After disabling the VPN, restart your mobile device to refresh its network connection. Then, try reconnecting your camera.
Final Thoughts
Connecting your Blink camera to Wi-Fi can sometimes be tricky, but it doesn’t have to be. Start by ensuring you’re using a 2.4 GHz Wi-Fi band, as Blink cameras won’t connect to 5 GHz networks. Double-check your Wi-Fi password and make sure it doesn’t have special characters.
If you’re having trouble, try restarting your router and Blink camera. Taking this simple step can often fix connection issues. Also, confirm that your camera is in pairing mode and close to the router for better signal strength.
If you’re using a sync module, ensure it’s functioning properly, with solid blue and green LED lights.

